Keeping your phone number accurate and updated in your EventBookings account is crucial for ensuring smooth communication, timely notifications, and additional account security. Whether you want to add a new phone number or update an existing one, EventBookings makes the process simple and efficient. Follow the detailed steps below to manage your phone number seamlessly.
Step 1: Access Your Member Account
Begin by logging into your EventBookings account using your current credentials. Once logged in, navigate to your Member Account. This section of your account dashboard allows you to manage all your personal and account-related settings conveniently.
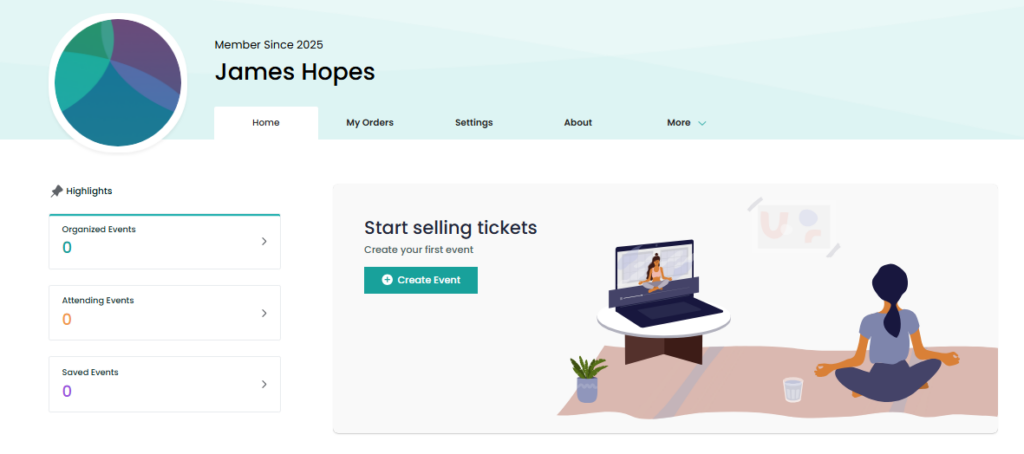
Step 2: Open the Settings Menu
From your member account, locate the Settings option in the navigation menu. Click on it to access a range of options for managing your account details. The settings menu is the central hub for updating your contact information, including your phone number.
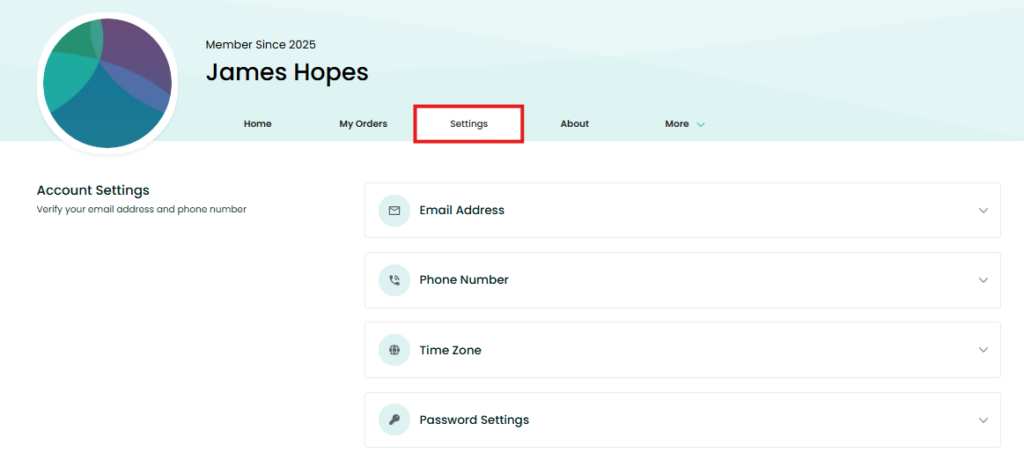
Step 3: Navigate to the Phone Number Section
Within the Settings menu, find the Phone Number dropdown menu. Click on it to expand the phone number management options. This section is where you can either add a new phone number or edit an existing one.
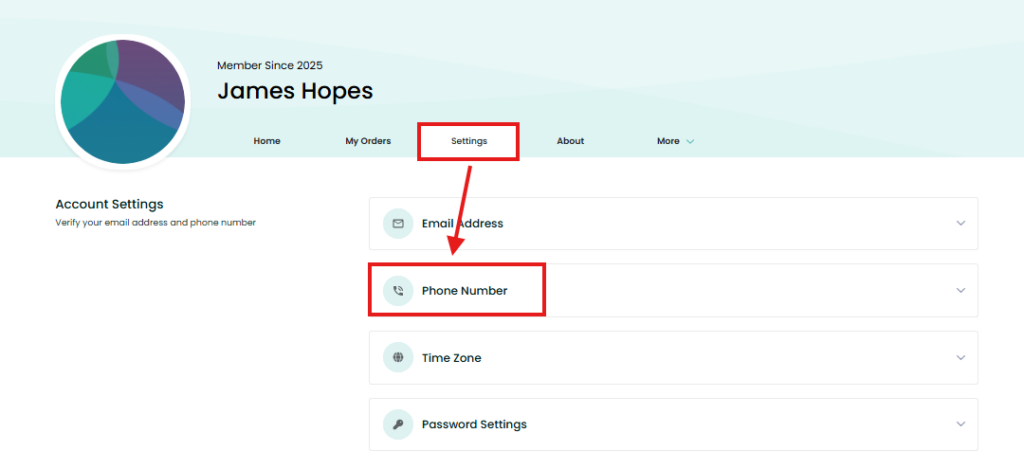
Step 4: Add a New Phone Number
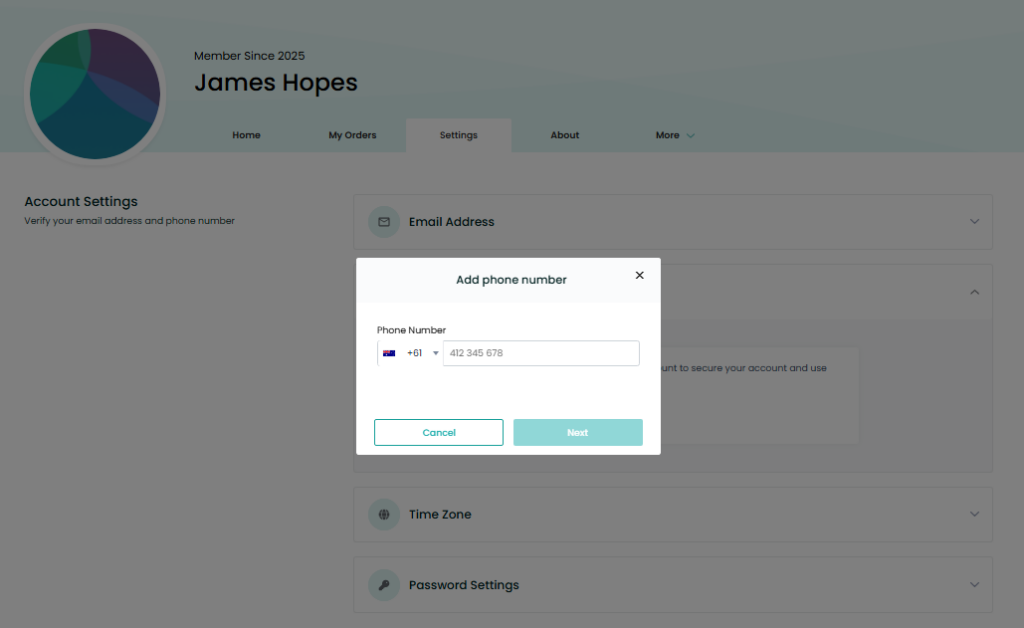
If you haven’t already linked a phone number to your account, you can add one by clicking on the Change button. A new input field will appear, allowing you to enter your phone number. Ensure the number you provide is accurate and active, as this will be used for verification purposes and important communications related to your account.
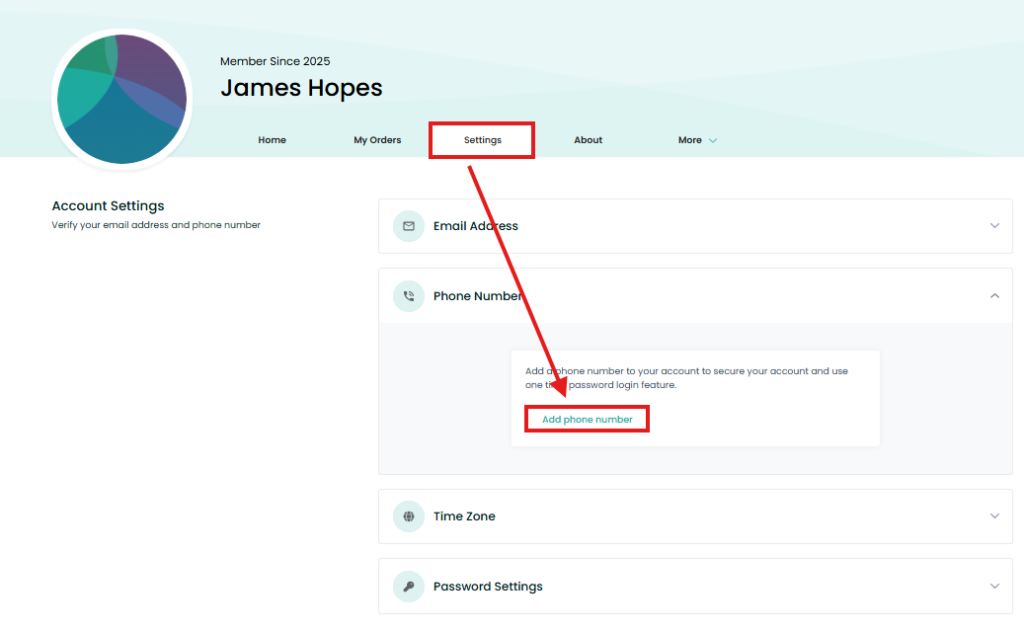
Step 5: Update an Existing Phone Number
If you wish to replace your current phone number with a new one, follow the same steps:
- Click on the Add Phone Number button.
- Enter your updated phone number in the input field.
- Confirm the details and proceed to the next step by clicking Next.
Updating your phone number ensures you remain reachable for any urgent event-related updates or account alerts.


Step 6: Verify Your New Phone Number
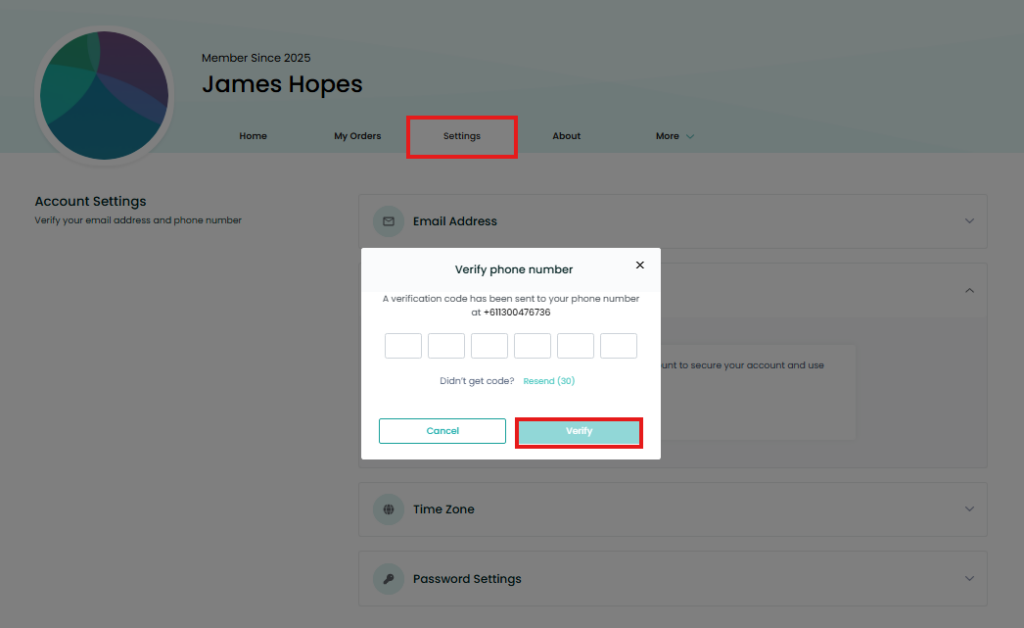
After entering your new phone number, EventBookings will send a verification code to the number you provided. This step is essential to confirm the validity and ownership of the phone number. Check your phone for a text message containing the verification code.
- Enter the verification code into the designated field on the screen.
- Once the code is entered, click the Verify button to complete the process.
The system will validate the code, and your new phone number will be successfully added or updated to your account.
Need Assistance?
If you encounter any difficulties while adding or updating your phone number, or if you don’t receive the verification code, don’t worry! Visit the EventBookings Help Centre for troubleshooting tips and additional resources. Alternatively, you can reach out to our support team, who will be happy to help you resolve the issue.