The EventBookings API provides a powerful way to integrate your platform with our event ticketing system, enabling real-time ticket management, event synchronization, and enhanced automation. To access these API features, you must first create an application in your EventBookings account. This step-by-step guide will walk you through the process of creating an application and using the API effectively.
Step-by-Step Guide
Step 1: Ensure Eligibility
Before proceeding, ensure you meet the following requirements:
- You have an active Flexible Annual Subscription Plan.
- You have purchased the Annual API Add-On.
If these prerequisites are not met, upgrade your organization from the Subscription page or you will find the upgrade option on the My Application page.
Step 2: Navigate to the Application Creation Page
- Log in to your EventBookings account.
- From the top menu, click the “My Applications”.
- You will find a list of your organizations, and on the right side of each profile, you will find either the “Upgrade” button or “Add Application (if the organization is eligible)” button.
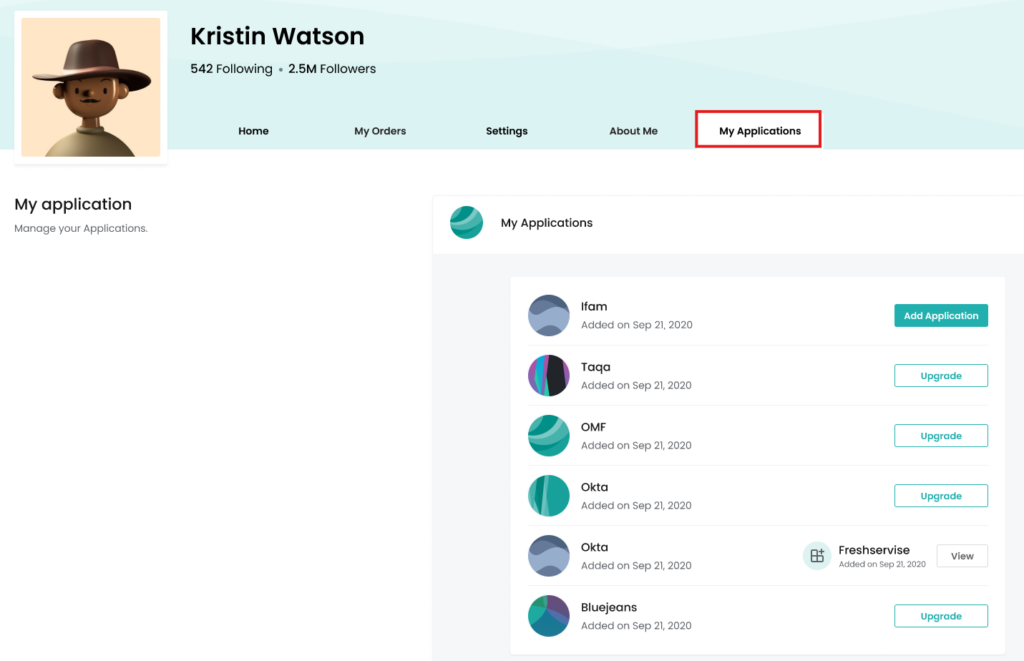
Step 3: Upgrade to Create Application
- If you can’t find the “Add Application” button, press the “Upgrade” button.
- You will discover the tab that offers you to upgrade to unlock API Access.
- Once upgraded you will see the “Add Application” button to create your application.
Step 4: Provide Application Details
- Enter Application Name: Choose a unique name to identify your application.
- Specify Call Back URL: Provide the URL where API responses will be sent (e.g., your server endpoint).
- Select Scopes: Choose the appropriate API scopes based on the functionalities you want to access, such as ticket management or event creation.
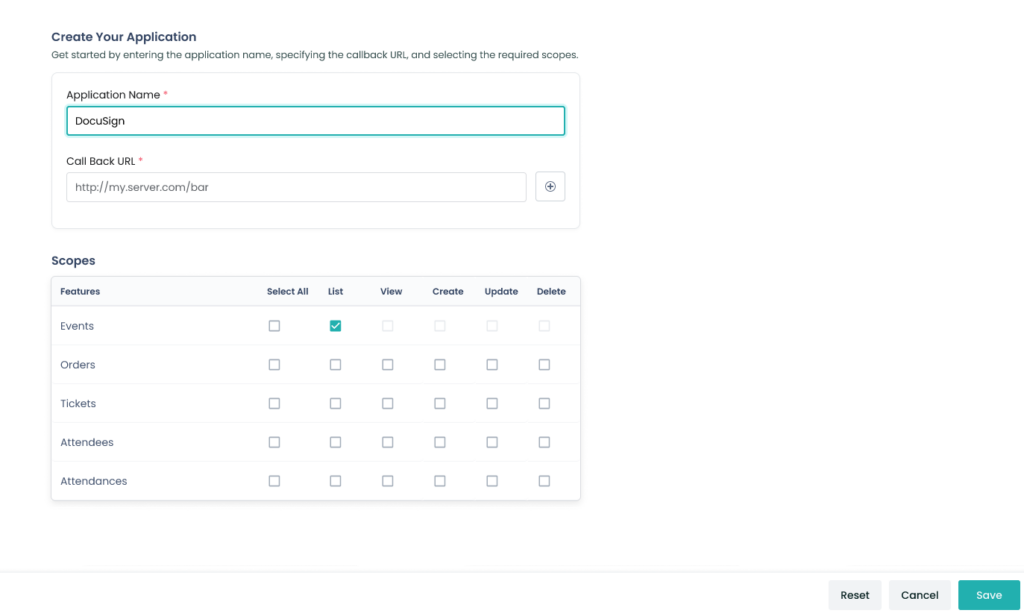
Step 5: Submit and Review
- Click Save to submit the application.
- Once submitted, your application will be listed in the Applications tab, along with its unique Client ID and Client Secret.
Step 6: Generate an Access Token
- Use your application’s Client ID and Client Secret to authenticate with the EventBookings API.
- Generate an access token via the API authentication endpoint.
Refer to the API Documentation for detailed instructions.
Step 7: Start Using the API
Once authenticated, you can start using the API to:
- Manage tickets (create, update, and delete).
- Synchronize event data.
- Retrieve real-time analytics.
Refer to the EventBookings API Documentation for endpoint details and usage examples.
How to Edit or Delete the Application?
To make any necessary changes, you can edit the Application. To do so, you can press the “View Application” button from the already-created Application. A new tab will open that offers Edit options for Call back URL or Permissions, and a Regenerate option for Client Secret. Moreover, if you want to remove the Application, you can also find “Delete Application” button at the bottom right corner.

If you encounter any issues or have questions, please contact us at contact@eventbookings.com.