Creating an event on EventBookings is simple and customizable, allowing you to host venue, online, or undecided events. Whether you need a one-off, recurring, scheduled, or timeslots-based event, the platform provides flexible options to suit your needs. Follow the steps below to set up your event quickly and efficiently.
Create an Event Based on Event Type
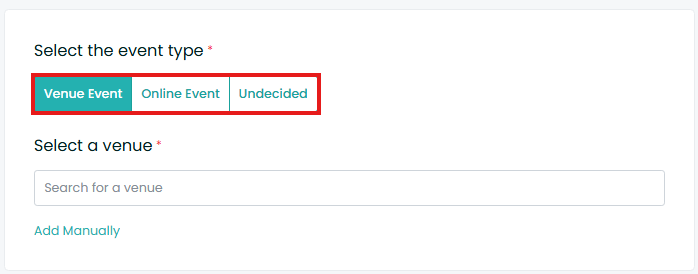
EventBookings allows you to create different types of events based on your requirements. You can choose from the following event types:
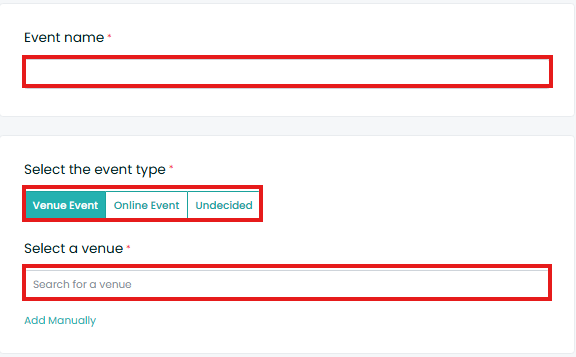
- Venue Event – Host your event at a physical location where attendees can gather in person. Enter the venue details, including the address and seating capacity, to ensure a seamless experience for participants. This option is ideal for conferences, concerts, and workshops.
- Online Event – Organise a virtual event that attendees can join from anywhere using an online platform. Simply add the meeting link, streaming details, and relevant instructions for participants. This is perfect for webinars, virtual meetups, and online training sessions.
- Undecided Event – If you have not yet finalized the event venue, select this option. You can update the event details later once you confirm the venue. This allows flexibility while planning your event.
Create a One-off Event
A one-off event is a single occurrence event that does not repeat. Follow the steps below to create a one-off event on EventBookings.
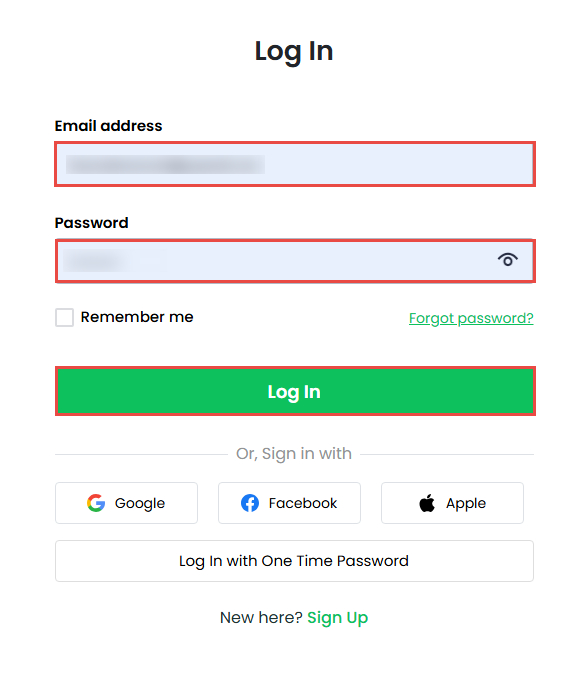
Step 1: Log in to Your Account
- Go to EventBookings and log in to your account.
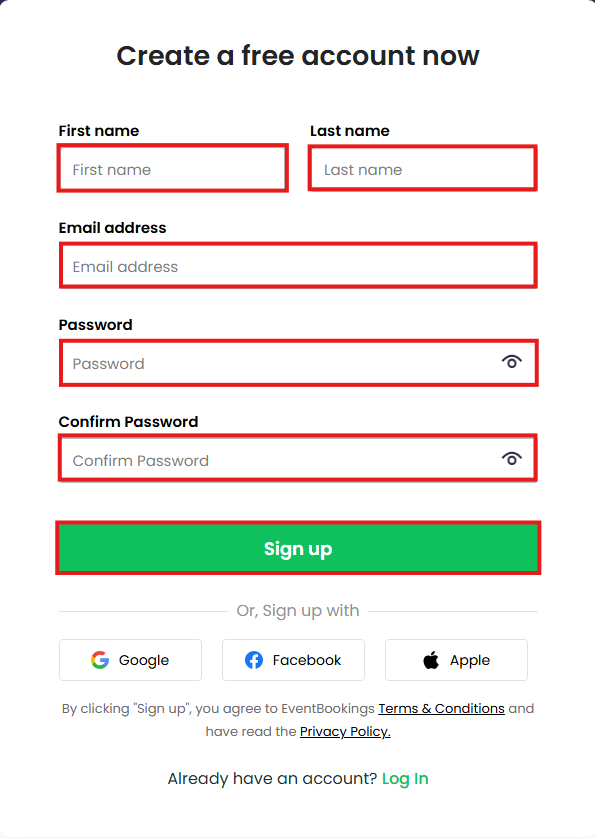
- If you do not have an account, click Sign Up to create a new account.
- Once logged in, click Create Event and select your organization.

Step 2: Add Event Details
- Enter the event name in the provided field.
- Add the event venue address (or leave it blank if the event is online).
- Since this is a one-off event, there is no need to modify the Event Repeat option.
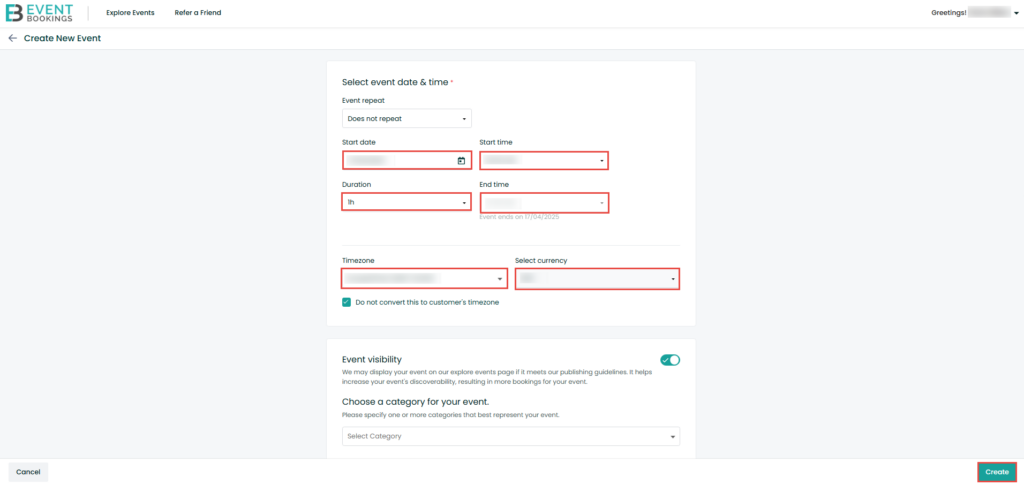
- Set the start date, start time, duration, and end time for your event.
- Select the time zone, currency, and event category that best suits your event.
- Click the Create button to finalize your event setup.
Your one-off event is now successfully created and ready for ticket sales or registrations.
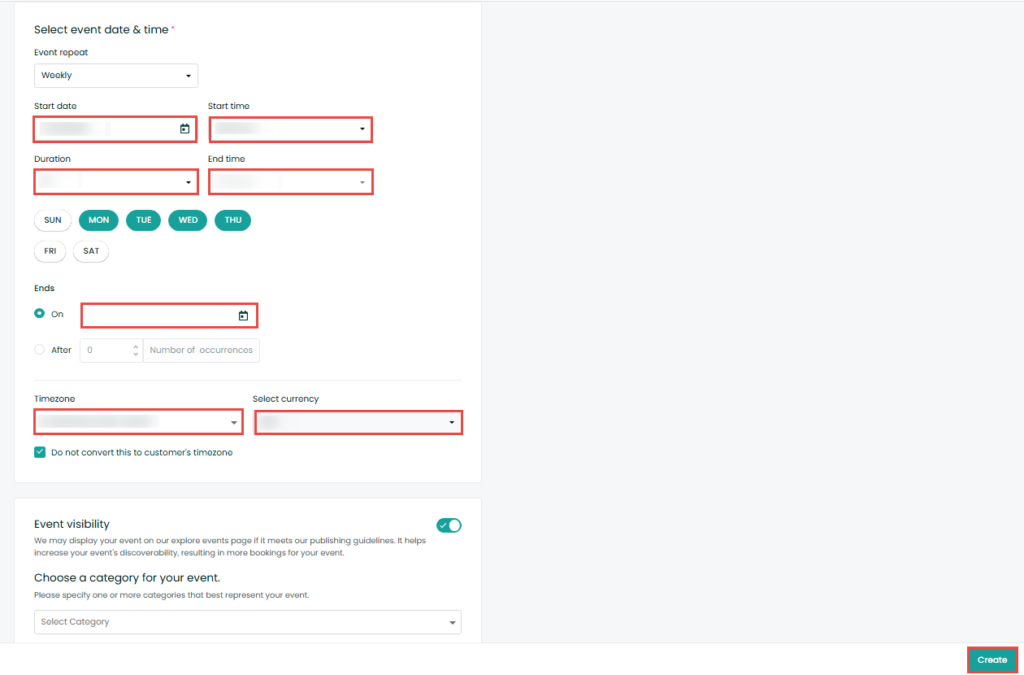
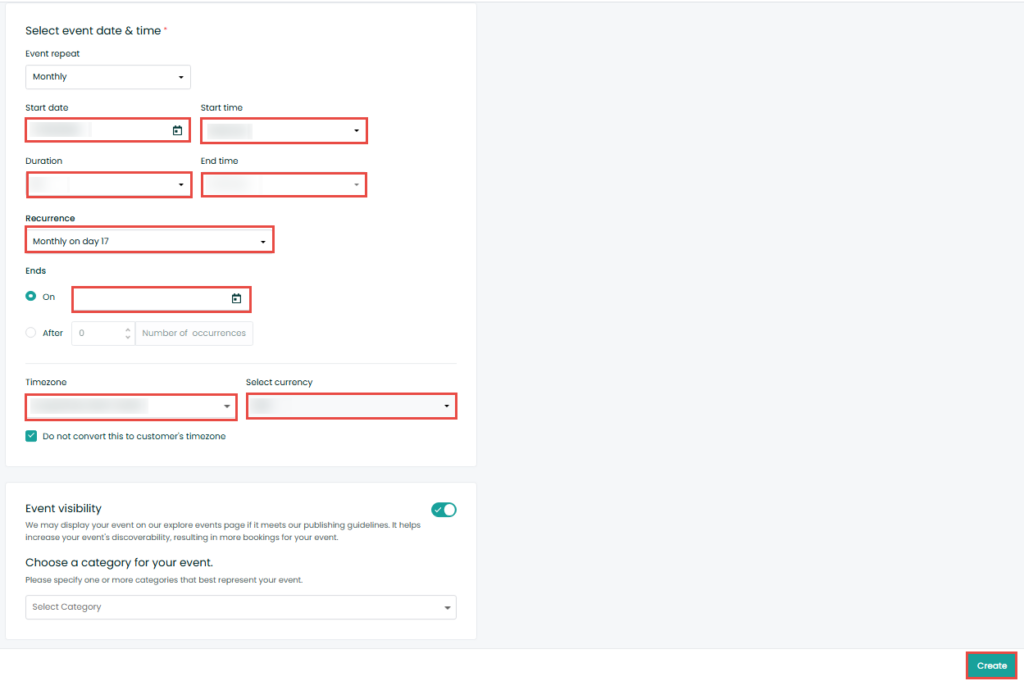
Create a Recurring Event
Creating a recurring event on EventBookings allows you to schedule events that repeat daily, weekly, or monthly. This feature is ideal for ongoing workshops, training sessions, or recurring meetups. Follow the steps below to set up your recurring event quickly and efficiently.
Step 1: Log in to Your Account
- If you do not have an account, create a new account.
- Click Create Event and select your organization.
Step 2: Add Event Details
- Enter the event name.
- Add the event venue address.
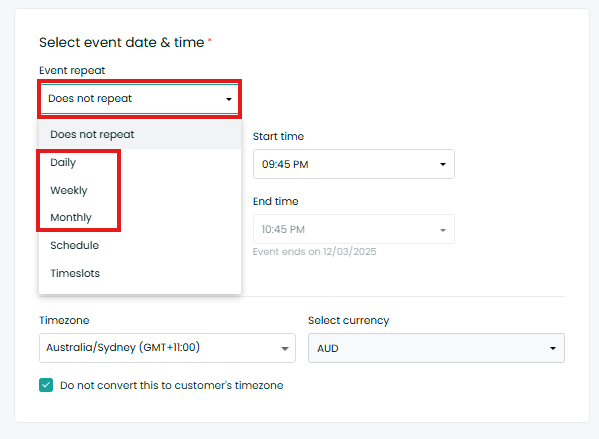
- Click the Event Repeat drop-down menu.
- Select Daily/Weekly/Monthly recurrence options.

Step 3: Configure Recurring Schedule
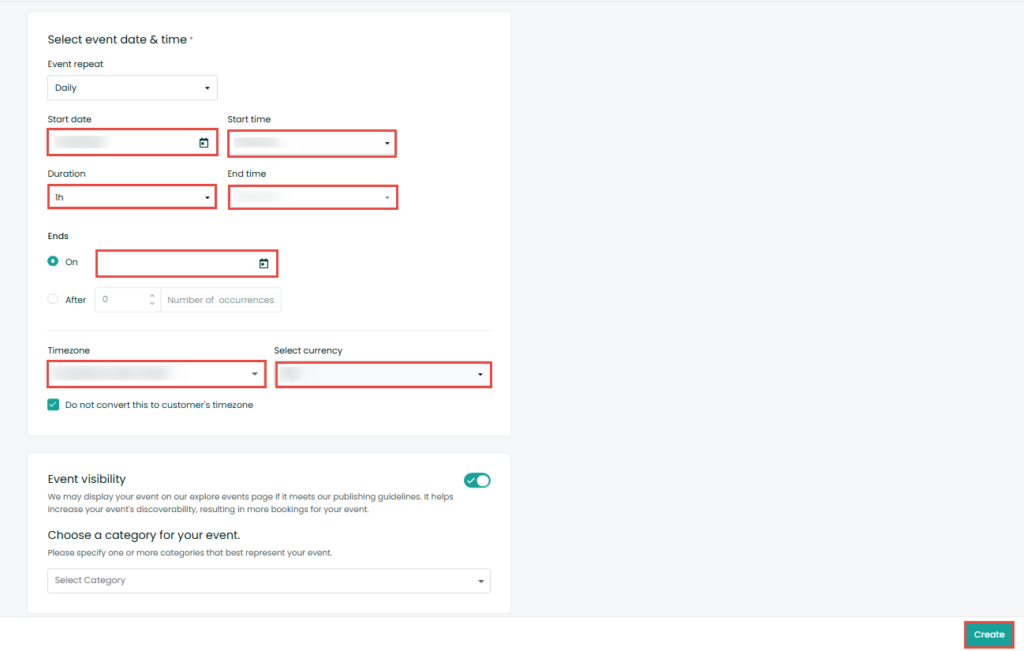
- Add the event date, start time, duration, end date or the number of occurrences.
- Select the time zone, currency, and event category that best suits your event.
- Click the Create button to finalize the recurring schedule.
Note: If your recurring event has many sessions, you can add them one by one, specifying the date, time, and duration for each instance.
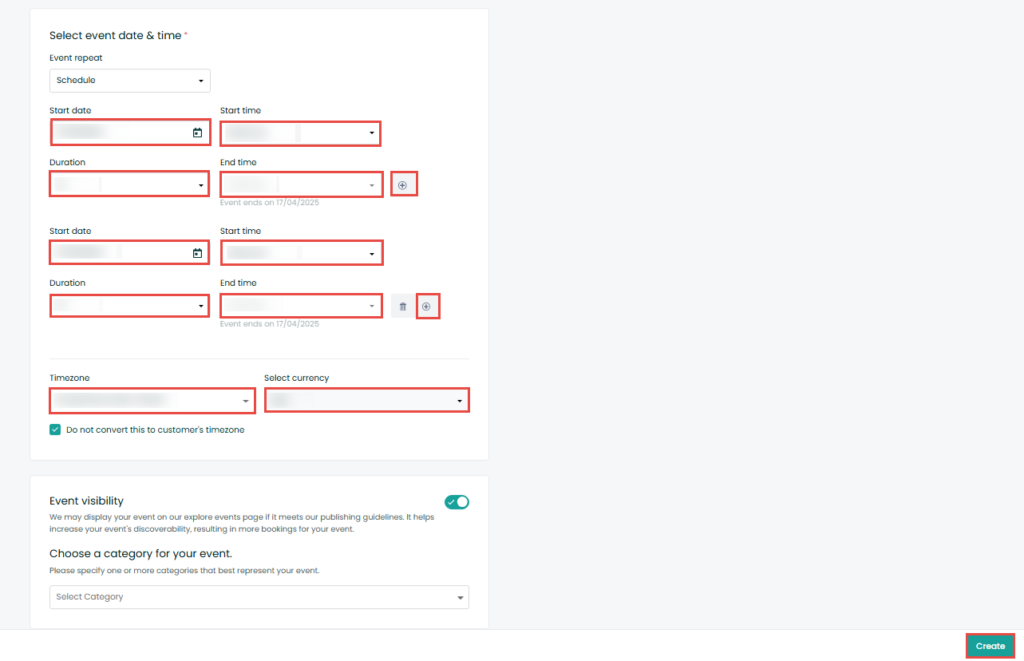
Create a Scheduled Event
Creating a scheduled event on EventBookings allows you to plan multiple sessions with predefined dates and times. This feature is ideal for events that take place at specific intervals without following a recurring pattern. Follow the steps below to create a scheduled event easily.
Steps to Create a Scheduled Event
Step 1: Log in to Your Account
- If you do not have an account, create a new account.
- Click Create Event and select your organization.
Step 2: Add Event Details
- Enter the event name.
- Add the event venue address.
- Click the Event Repeat drop-down menu and select Schedule.
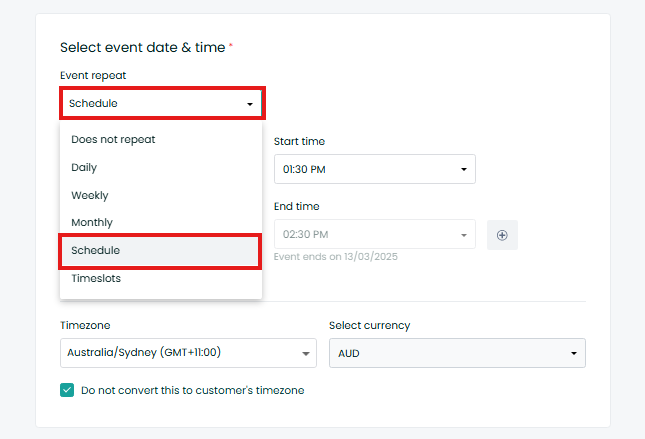
Step 3: Configure Event Schedule
- Add the event date, start time, duration, and end time.
- Click the + button to add multiple schedules.
- Select the time zone, currency, and event category.
- Click the Save button to finalize the schedule.
Create a Timeslots Event
A timeslots event allows you to set specific time intervals for bookings, making it ideal for appointments, workshops, or limited-capacity events. With EventBookings, you can configure custom timeslots, block out unavailable times, and set a notice period for better event management. Follow the steps below to create and manage a timeslots event.
Step 1: Log in to Your Account
- If you do not have an account, create a new account.
- Click Create Event and select your organization.
Step 2: Add Event Details
- Enter the event name.
- Add the event venue address.
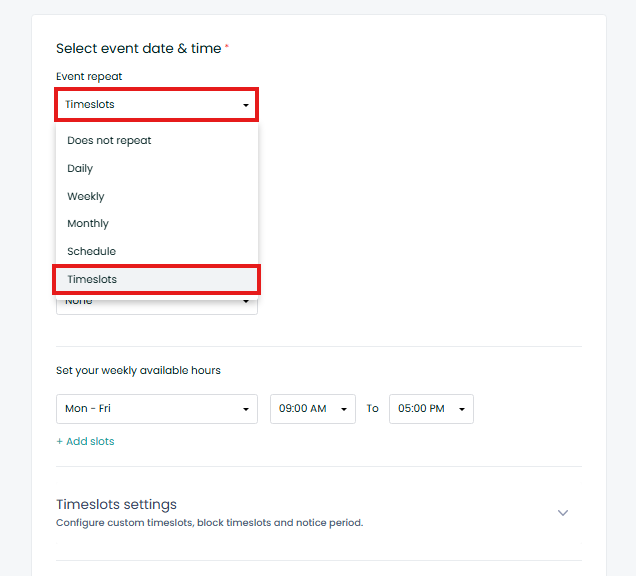
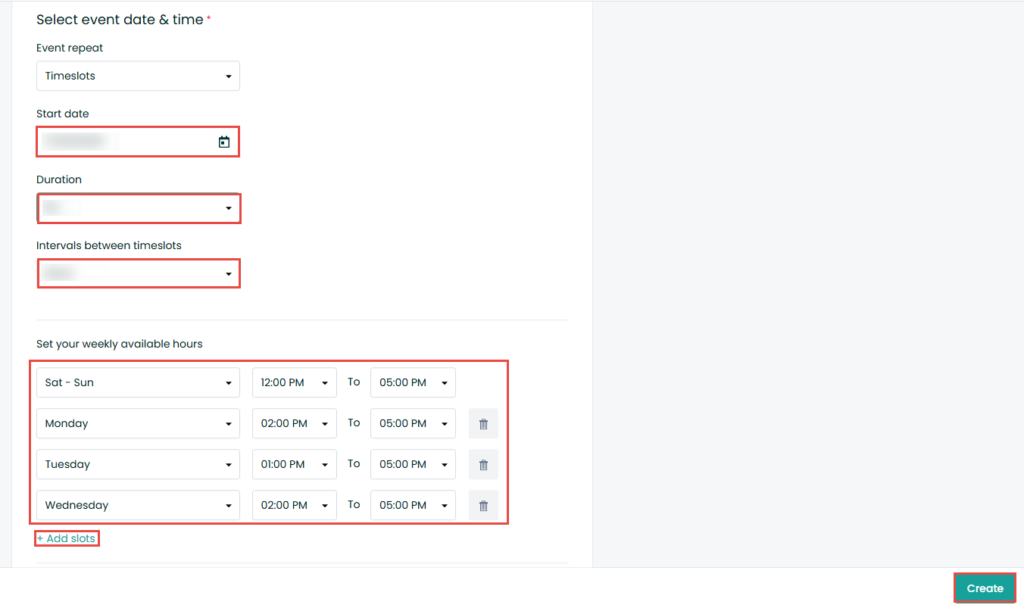
- Click the Event Repeat drop-down menu and select Timeslots Event.

Step 3: Configure Timeslots
- Add the event date, start time, and duration intervals between timeslots.
- Click the Add Slots button to set your weekly available hours.
Timeslots Settings
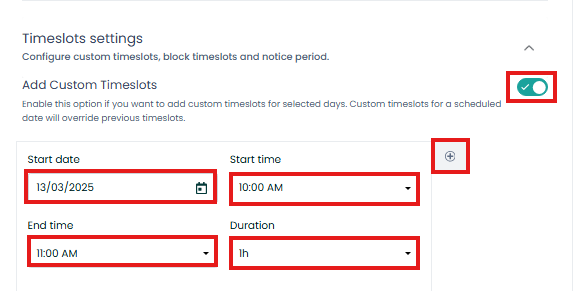
- Custom Timeslots: Enable this option to create custom timeslots for specific days. Custom timeslots override default timeslots.
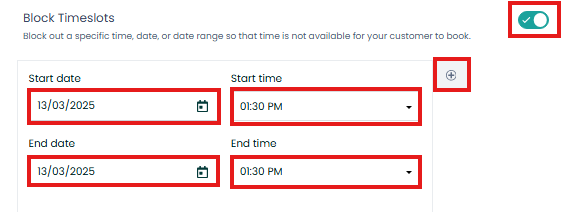
- Block Timeslots: Block specific times, dates, or date ranges to make them unavailable for booking.
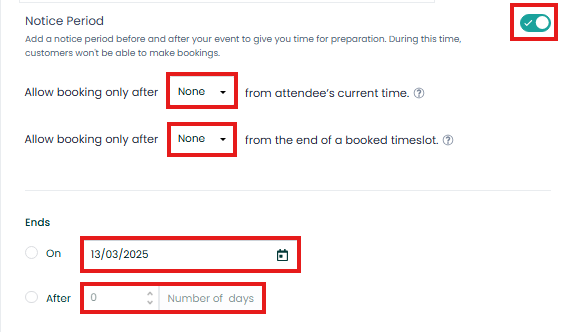
- Notice Period: Set a notice period before and after your event to allow preparation time. During this period, bookings will be restricted.
Step 4: Finalize the Timeslots Event
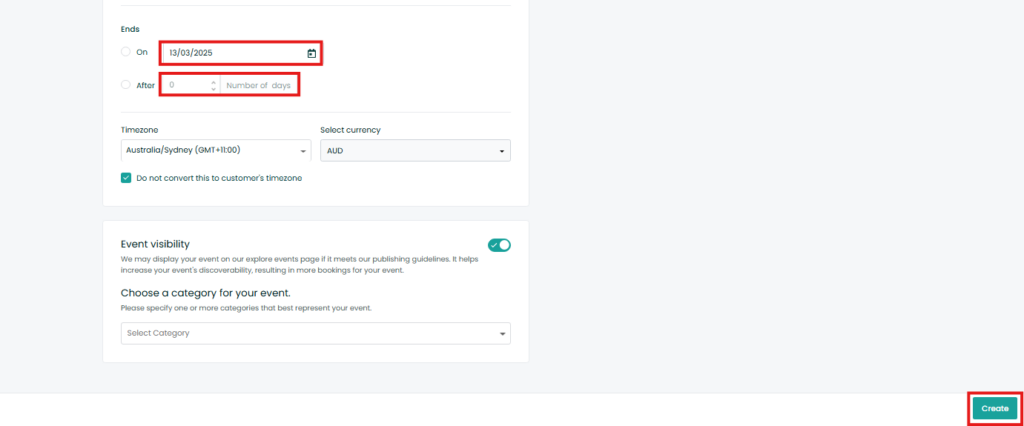
- Set the timeslots end date or specify the number of days the event will run.
- Click the Save button to update the event.
If you have any further questions, feel free to reach out to our support team.