Keeping your EventBookings account email up-to-date is essential for staying connected with important notifications about your events. Your email is the primary way to receive updates, reminders, and communications related to your bookings and attendee activities. If you’ve recently changed your email address or prefer to use a different one for your account, follow the detailed instructions below to update it seamlessly:
Step 1: Access Your Member Account
Begin by logging into your EventBookings account using your current credentials. Once you’ve successfully logged in, navigate to your Member Account. This section is where you can manage all your personal and account settings.
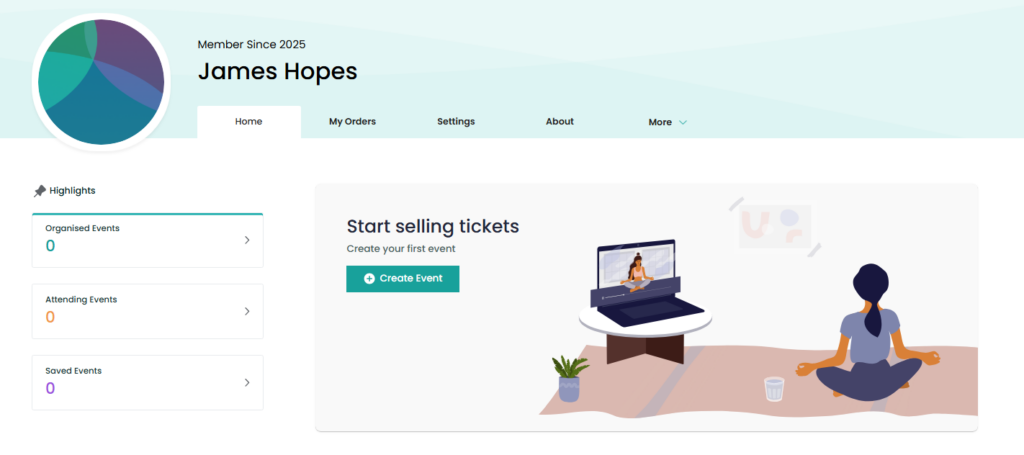
Step 2: Open the Settings Menu
From the dashboard of your member account, locate the Settings option in the navigation menu. Click on this to access your account settings page. This menu allows you to adjust various configurations, including your email address.
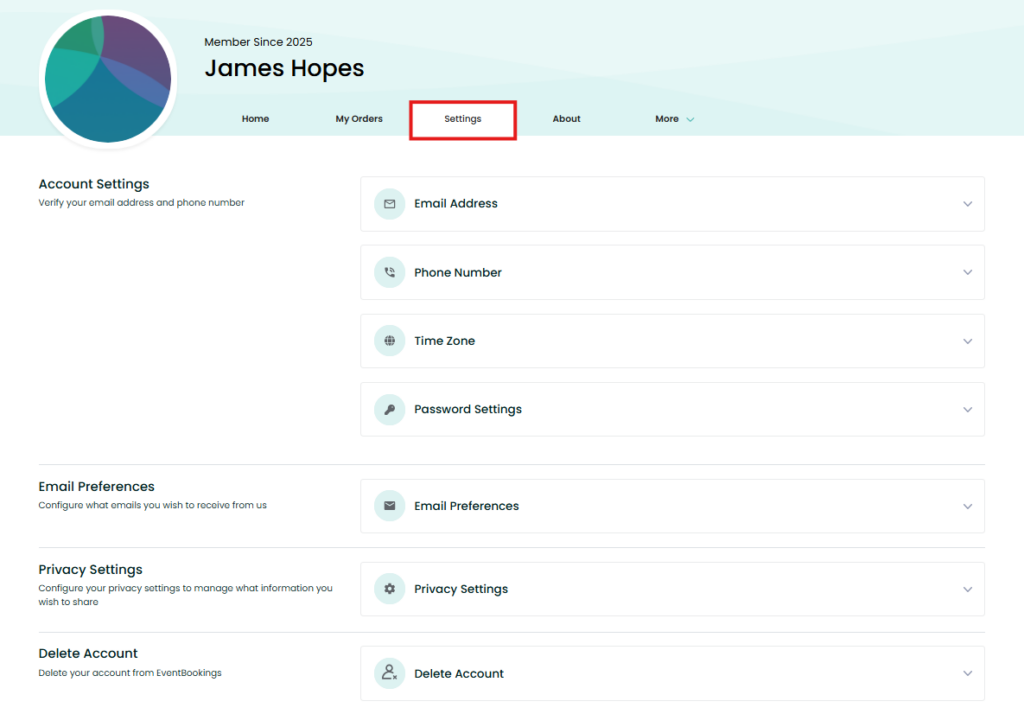
Step 3: Go to the Email Address Section
Within the Settings page, find the Email Address dropdown menu. Click on it to reveal the options available for managing your account’s email information. This section is specifically designed to help you update or confirm your registered email address.
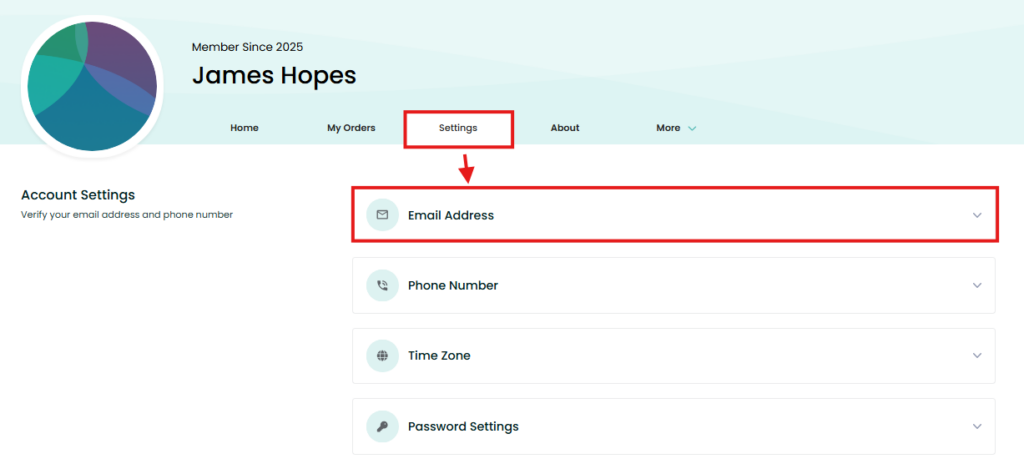
Step 4: Click the Change Button
Locate the Change button under the email address section. Clicking this button will allow you to initiate the email update process.
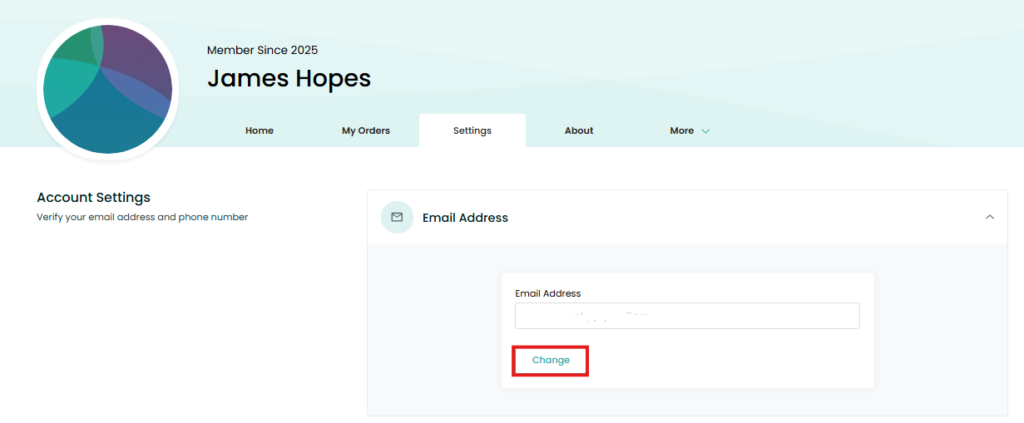
Step 5: Add Your New Email
In the designated field, carefully input your new email address. Ensure that the email address you enter is:
- Valid: The system will use this email for communication, so it must be active.
- Accessible: You’ll likely receive a verification email to complete the process.
Double-check your entry to avoid any typos that could lead to missed communications.
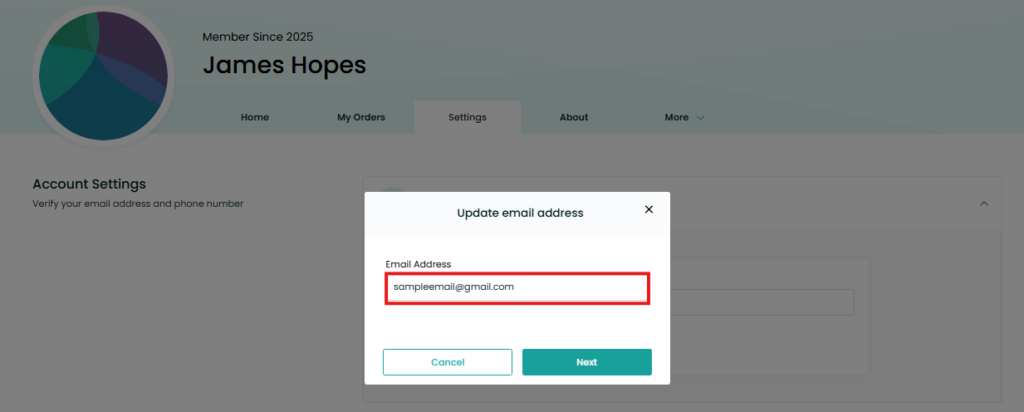
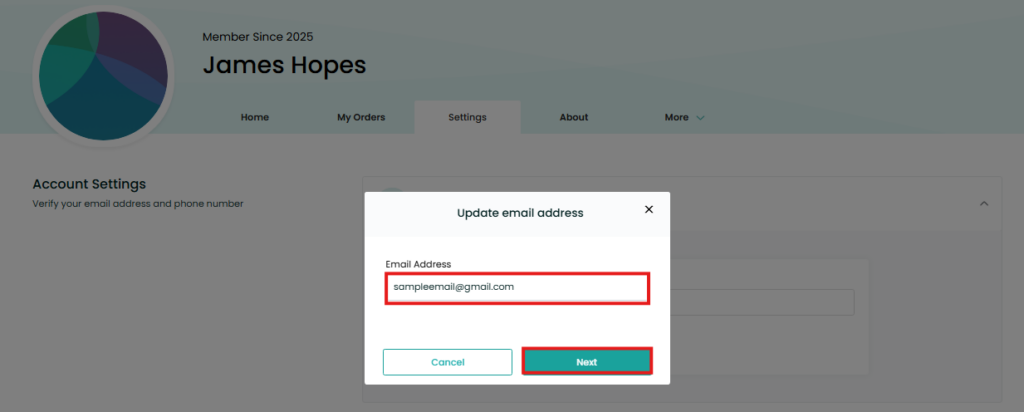
Step 6: Click on the Next Button
Once you’ve entered your new email, click the Next button to proceed. Depending on the system’s requirements, you may receive a verification email in your inbox. Open the email and follow the provided instructions to confirm your new email address.
Step 7: Add Your Verification Code
After submitting your new email, you will receive a verification code at the provided email address. Check your inbox, locate the verification email, and retrieve the code. Enter the code in the specified field within your EventBookings account to verify the change.
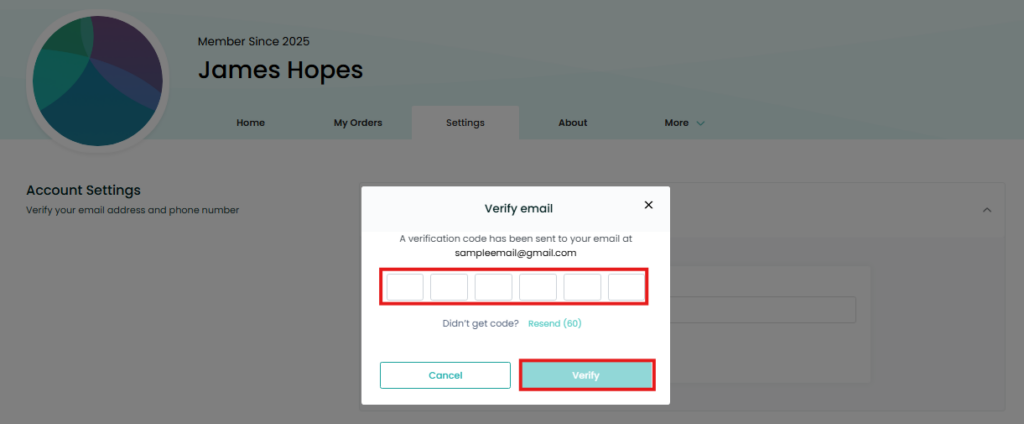
Step 8: Click Verify
Once you’ve entered the verification code, click the Verify button to complete the process. This step ensures your new email address is successfully linked to your account and ready for use.
Need Assistance?
If you face any difficulties or need help during the email update process, visit the EventBookings Help Centre or contact our support team. We’re here to help you maintain a seamless account experience.