Email customisation in EventBookings helps you personalise communications to match your event’s branding and tone. It is a straightforward process designed to enhance your event’s communication.
Follow this detailed guide to edit, preview, and test email templates effectively:
Access the Email Customisation Menu
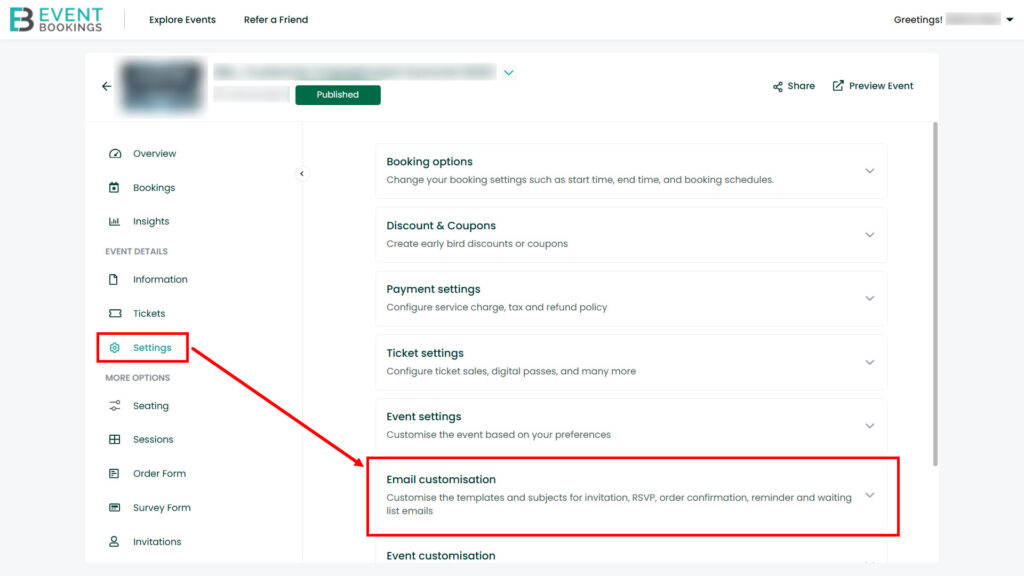
Start by accessing the Settings from your event dashboard. In the settings menu, locate and click on Email Customisation. This will take you to the area where you can adjust your email templates to suit your event’s needs.
Edit the Email Template
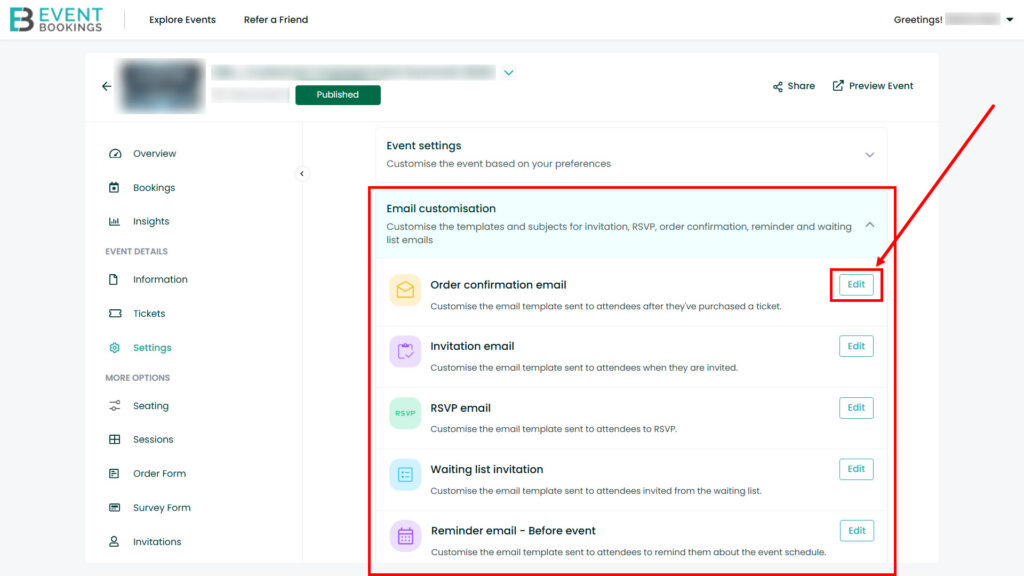
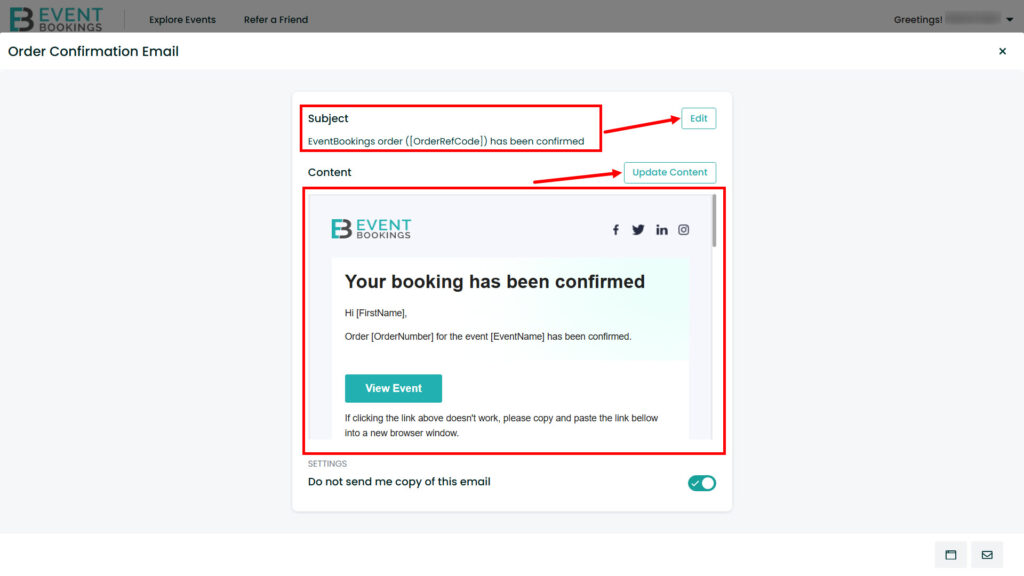
Once in the customisation section, you will find out a row of different categories of email like Invitation email, RSVP email etc. like you see on the image. On right side of each email type you will find the Edit option. Select the category based on your email type and click the Edit option to start modifying your email.
Edit Additional Options
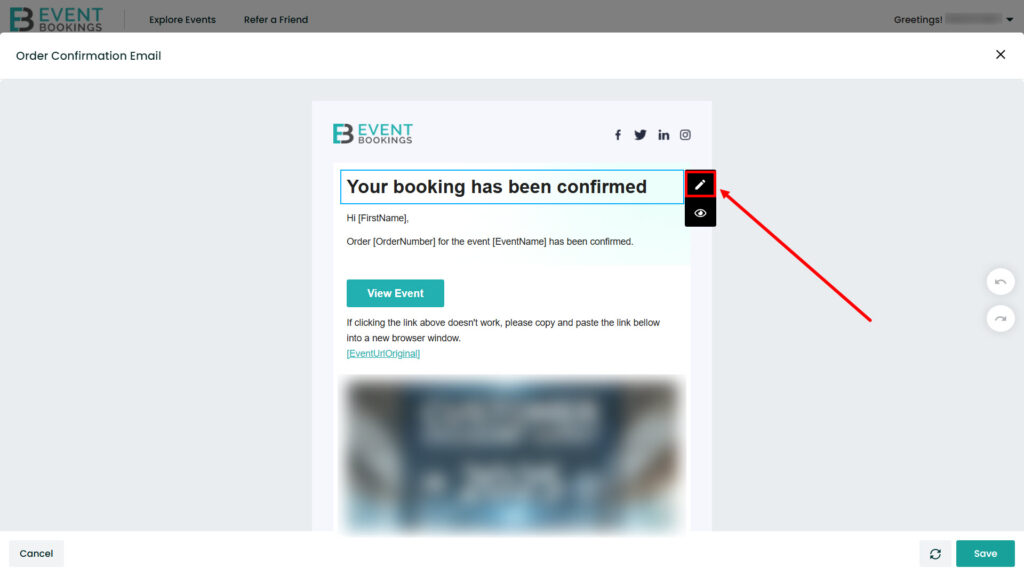
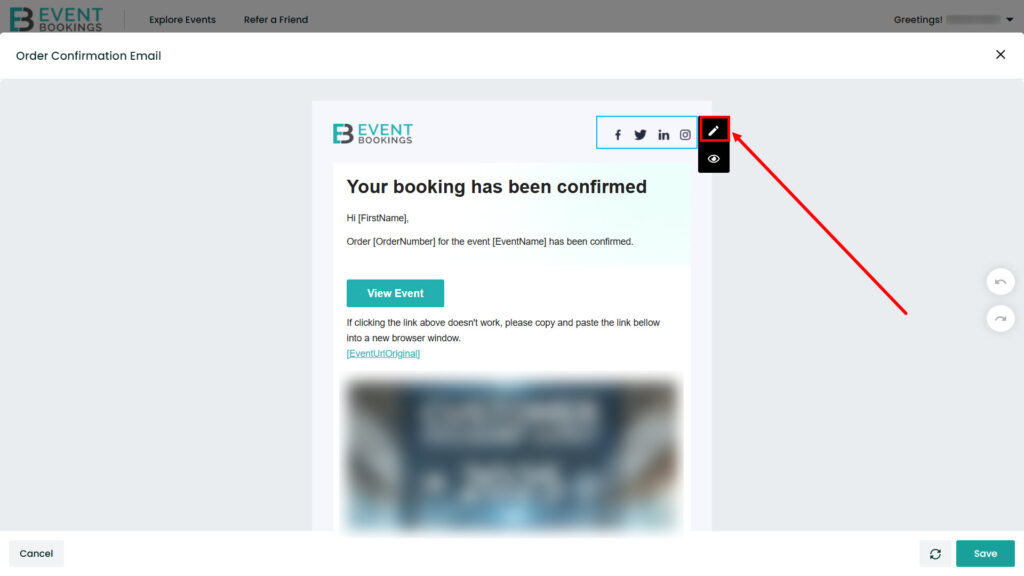
Once you click the Edit option a new page will open up. There you can customise the content of the email, including the header, body, and footer. Additionally, you can update the social profiles by clicking on the logos.
Save Your Changes
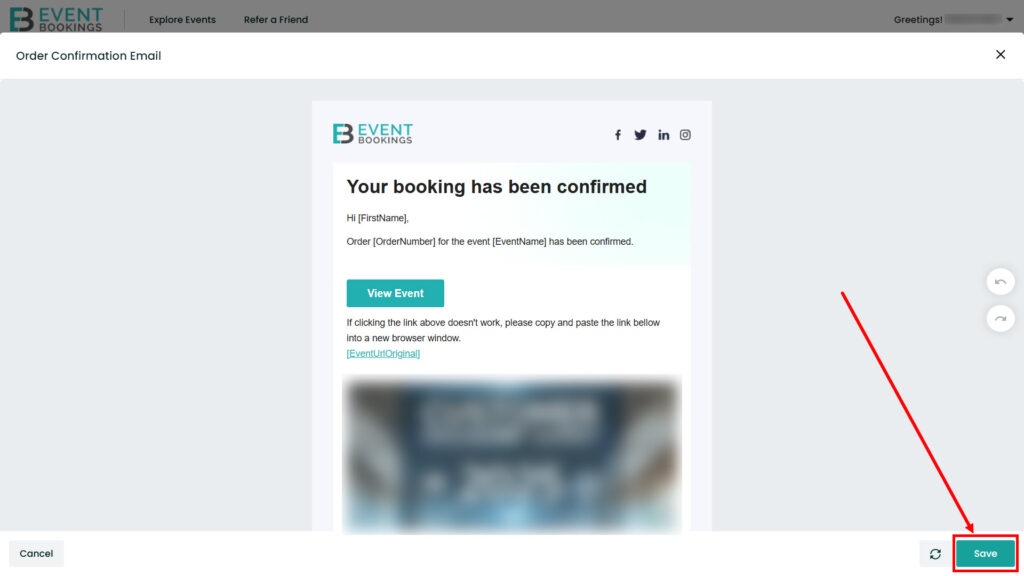
After editing the template, click the Save button to confirm your updates. Ensure all the changes are accurate before saving to avoid the need for repeated adjustments.
Adjust Additional Preferences
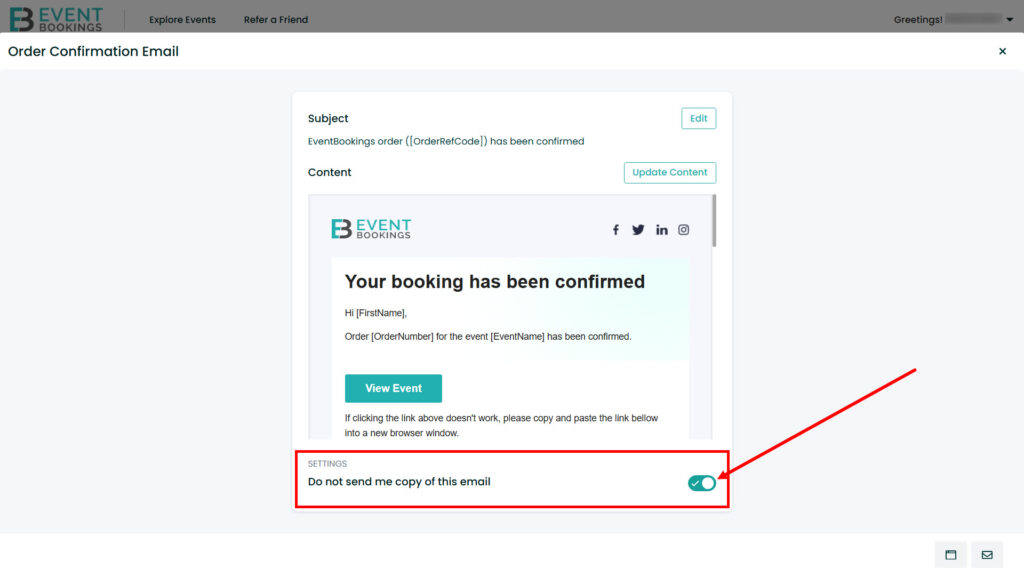
You can manage settings like enabling or disabling the option to not send a copy of the email. This option gives you control over recipient communication and lets you decide what you want to receive.
Preview the Email Template
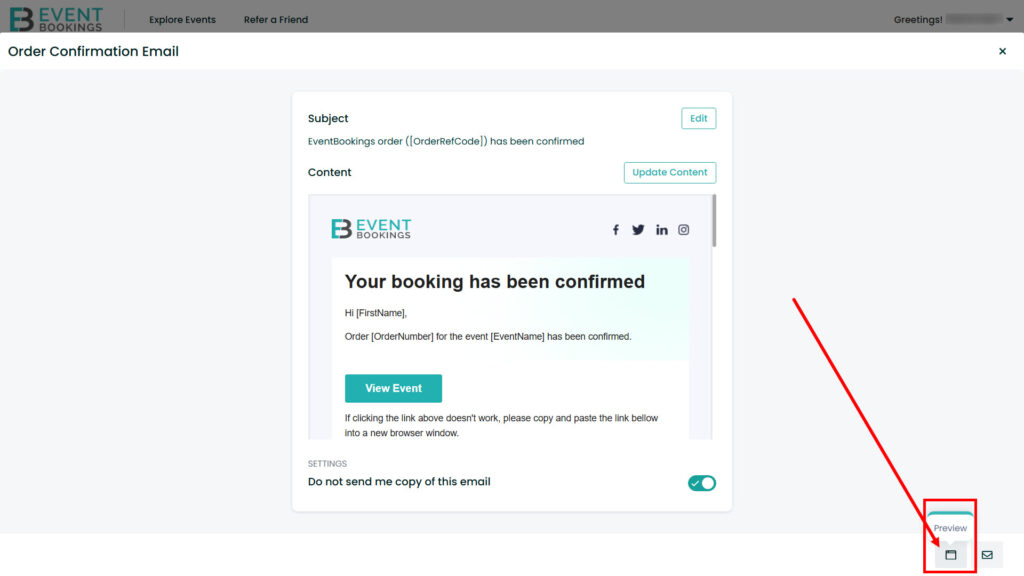
Once you are done with all the editing, it’s better to check how it will look to the receivers. Use the Preview button to see how the email will look when sent. This is an essential step to ensure the format, text alignment, and design are correct.
Test Your Email
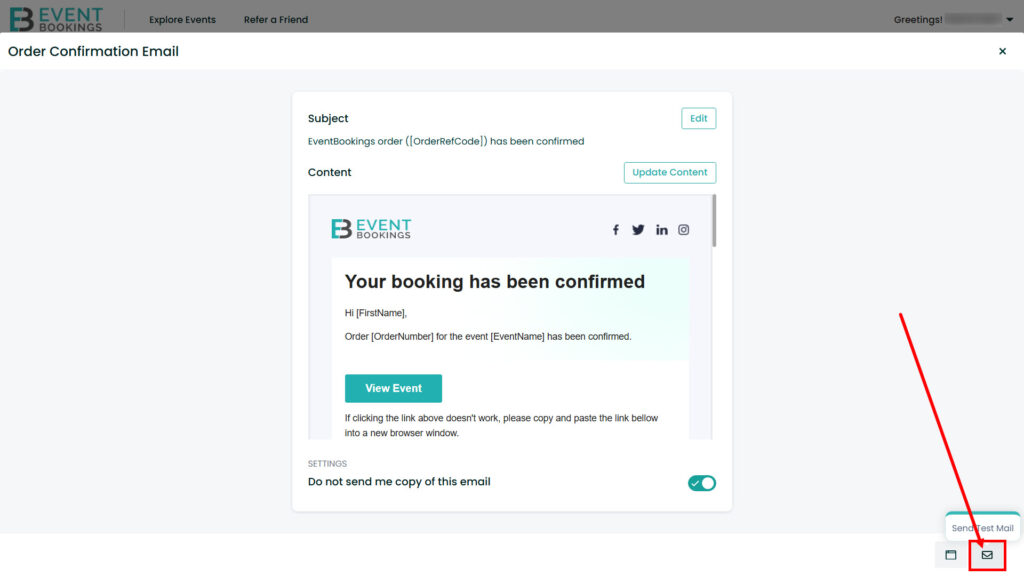
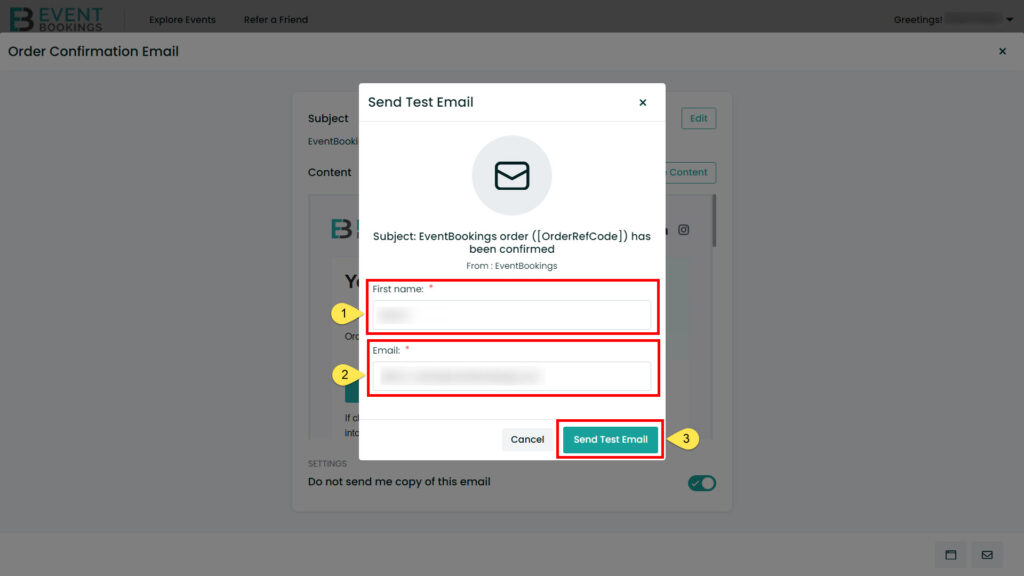
Finally, send a test version of your customised email by clicking Send Test Email button. This ensures your audience will receive the email exactly as intended.
