Event organisers constantly look for ways to enhance their events and increase revenue streams. One effective strategy is to sell merchandise items alongside event tickets. EventBookings makes this process simple and seamless, allowing organisers to offer a variety of merchandise items to attendees. Here’s how you can set up and sell merchandise items alongside event tickets with EventBookings:
Create Merchandise Items: Create your merchandise items within the EventBookings platform. For each item, include details such as name, price, description, and an optional image. For example, you could offer event-themed T-shirts, hats, or accessories.
- Log in to your account.
- Go to your Organisation Dashboard.
- Locate the Merchandise section on the left-hand side of the dashboard.
- Click on the Add Merchandise button.

5. Give your merchandise a name, set the price, and add a description.
6. Set the minimum and maximum order quantities. This is the minimum and maximum number of items a customer can order.
- The minimum quantity ensures that attendees are required to purchase a certain number of items. For example, suppose you are hosting a concert and want to ensure all attendees purchase a t-shirt. In that case, you could set the minimum quantity for the t-shirt item to 1. This means attendees cannot complete their booking without purchasing at least one t-shirt.
- Maximum quantities can limit merchandise purchases for one attendee for each checkout process. For example, if you are hosting a conference with a limited stock of specific merchandise items, you could set the maximum quantity to 10. This means that each attendee will only be able to purchase a maximum of 10 items during a single checkout process

7. Select the event for which you want to sell the merchandise. You can also make the merchandise available for multiple events.
8. Upload an image of the merchandise. This will be displayed on the event page where customers purchase event tickets, such as Help Center and Event Bookings.
9. Click the Save button to add the merchandise to your event.

You can give away free merchandise at your event by setting the price to $0. This way, attendees will receive these items as complimentary gifts during checkout.
Link Merchandise to Events: Once your merchandise items are created, you can easily link them to your events. Select the events where you want to offer each merchandise item for sale.
Display on Event Page: The merchandise items will be prominently displayed on your event page alongside the event details and ticket options. This allows attendees to browse and add merchandise items to their cart while purchasing event tickets.
Checkout Process: During checkout, attendees can review and edit their merchandise selections before purchasing. They will also see their order summary, including event tickets and merchandise items.
Managing Products
Once you’ve set up your merchandise in EventBookings, you can easily manage it from the Organiser Dashboard. Here’s a step-by-step guide
- Log in to your EventBookings Organiser Dashboard.
- Go to the Merchandise section on the left-hand side of the dashboard.
- Find the merchandise item you want to manage in the list and click on the ellipsis to open more action.
- To edit your merchandise information, click Edit, make the desired changes, and click the Save button.
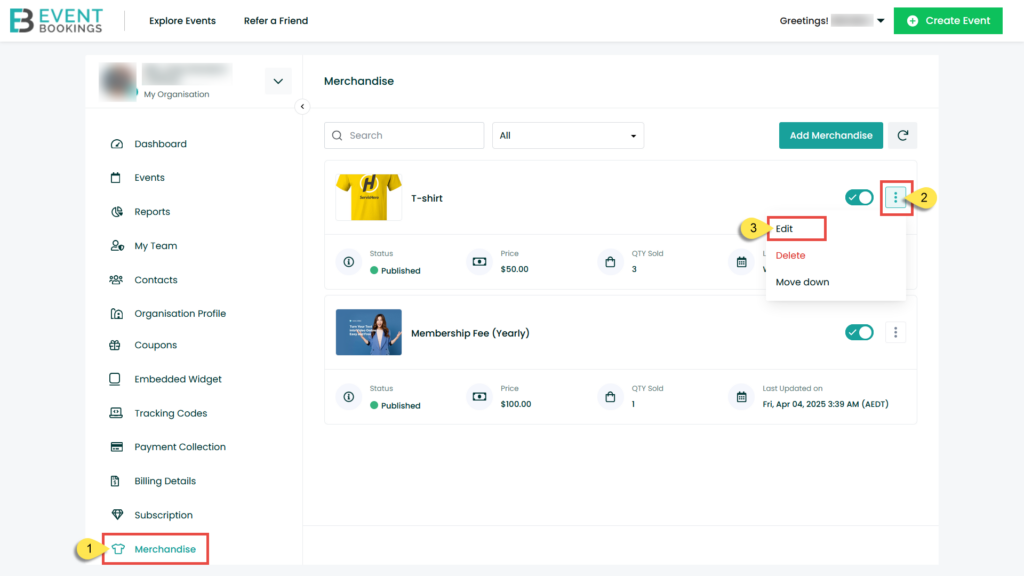
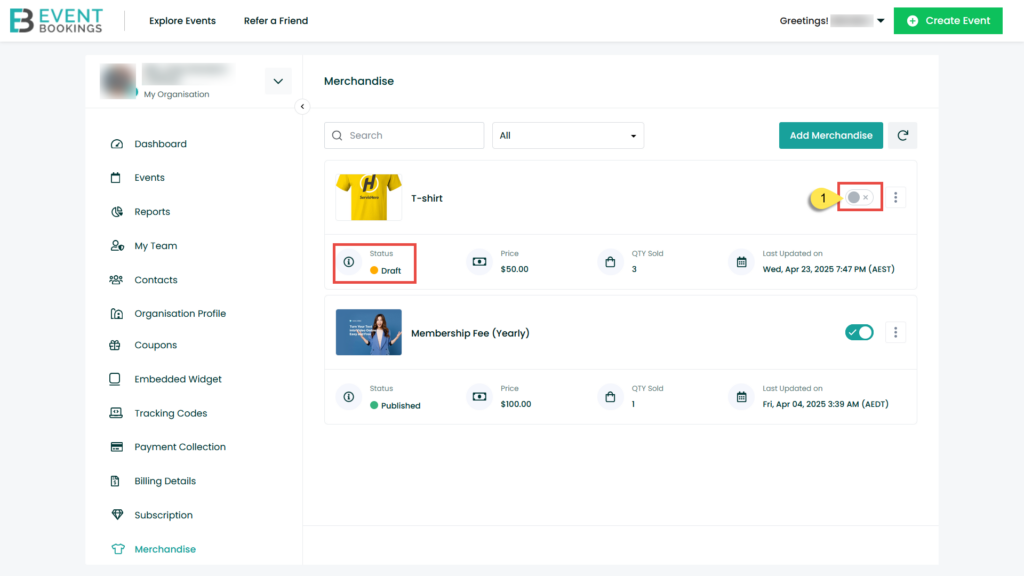
5. To enable or disable sell for your merchandise, click the toggle bar next to the merchandise name.
6. To delete your merchandise item completely, click on the Delete button.
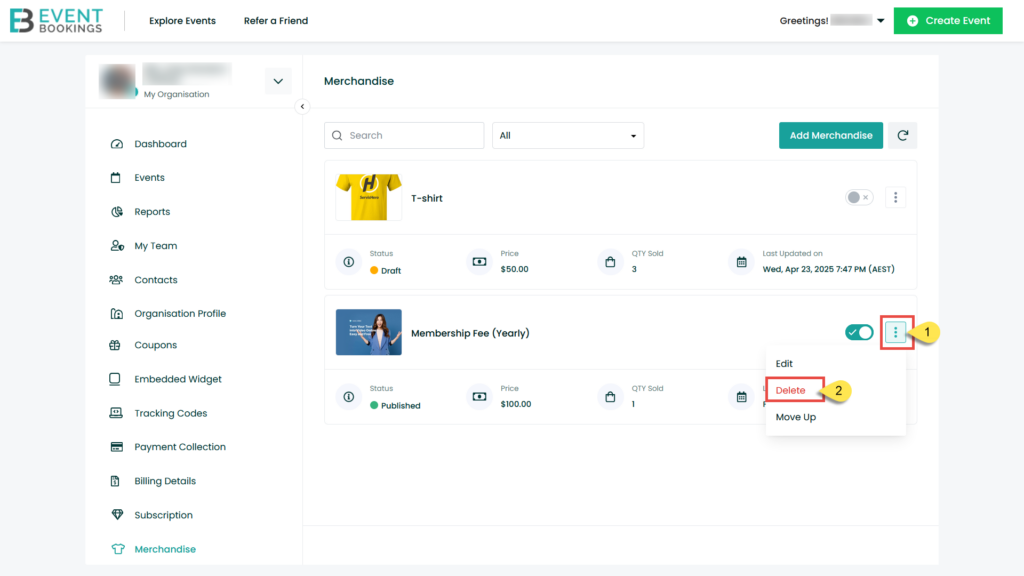
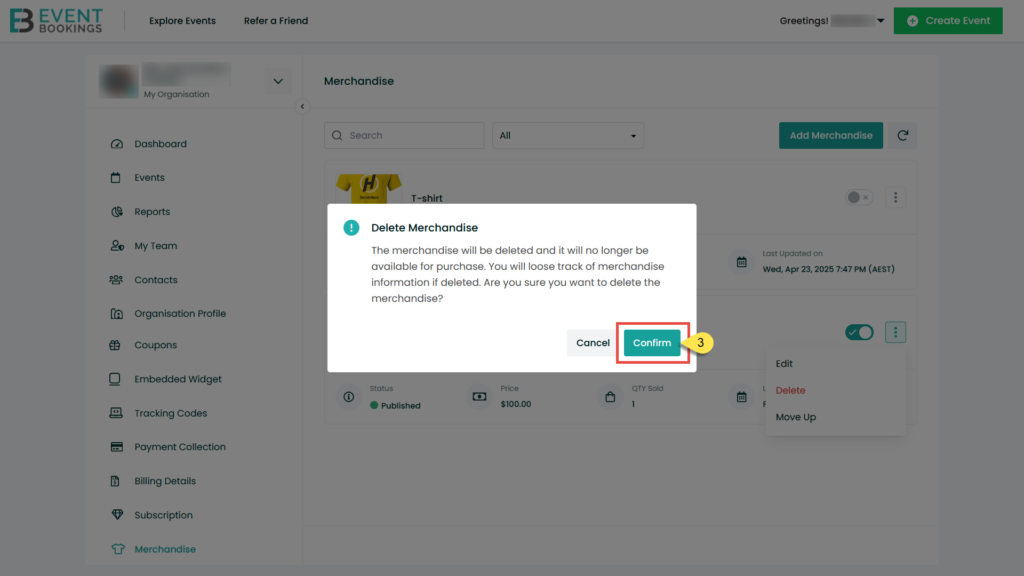
Please note that deleting a merchandise item is permanent and cannot be undone. Also, sold merchandise can not be deleted.
How to Purchase Merchandise
Purchasing merchandise for your event is a straightforward process for attendees. Here’s an overview of how attendees can purchase merchandise from your event:
- From the event page, attendees will click on “Purchase Tickets.”
- In the ticket purchase flow, attendees will select their desired tickets and click “Continue.”
- After selecting their tickets, attendees will be presented with the option to purchase merchandise. They can select the desired merchandise items and adjust the quantity.
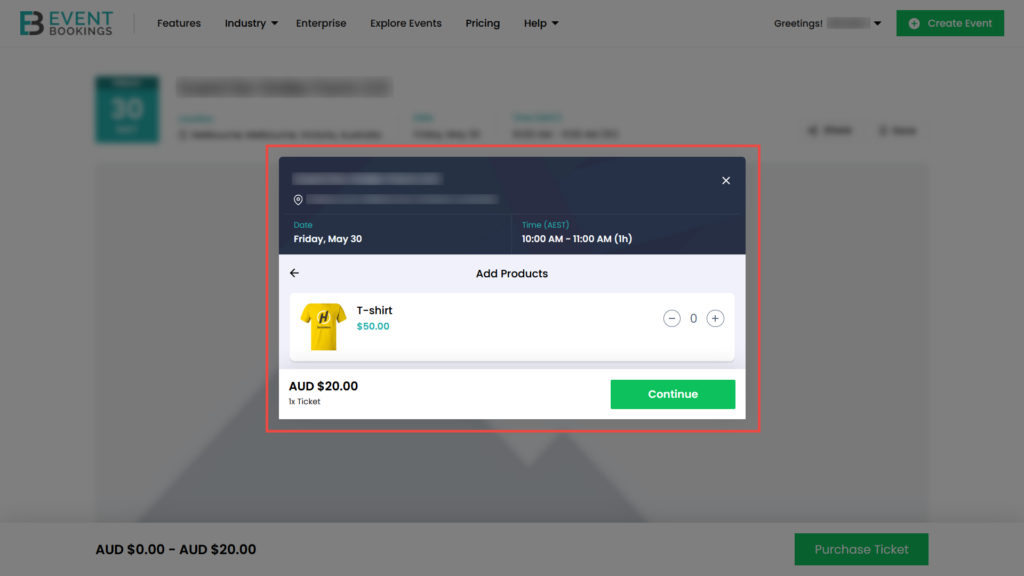
- Finally, attendees will proceed to the checkout page to complete their purchase.