With the Invitations feature, you can easily send email invitations to your attendees and track their bookings. You can send a regular email invitation or an RSVP, where your invitees can respond to your invitations. EventBookings also lets you customize the email templates so you can add your personal touch to the event invitations. You can send invitations in three ways:
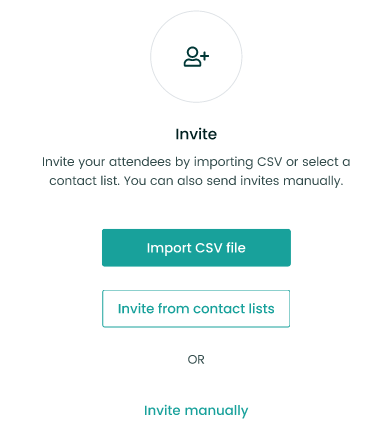
- Import CSV: Upload a CSV file with your contact list to send invitations in bulk.
- Select a Contact List: Choose from your existing contact lists to send invitations to specific groups.
- Invite Manually: Type in each invitee’s name and email address to send personalized invitations.

How Invitations Works
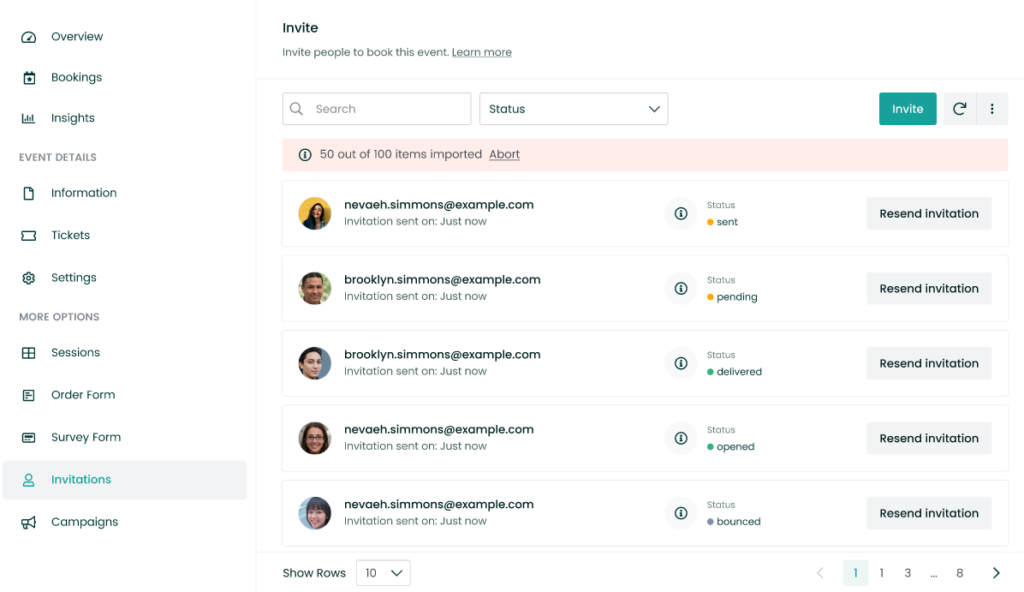
By importing CSV, you can invite attendees in bulk. We provide a template CSV, or you can create your own CSV with the first name, last name, and email address. Once the invitation process is complete, you can view the status in the list.
Before sending invitations, please ensure that the event has been published.
You can also invite attendees with additional information. The information you provide during import time will be pre-filled for them during checkout. To enable this feature, you must set up the order form and create fields to collect information from each attendee. Read this article to learn more about collecting information from attendees.
You can send invitations to a contact list. We generate lists for you as you continue with your events, or you can create your list. Select a list, like people who have purchased tickets from all your events, to make inviting more convenient. To learn more about contacts and contact lists, visit here.
You can cancel the invitations at any time by closing the live window or clicking the abort button.
Lastly, when you need to invite one or two invitees without the hassle of creating a CSV or list, choose “Invite Manually” and type in their name and email address.

EventBookings provides simple and customizable email templates. We generate the email with your event card and your organization’s logo, and you can easily update the content to suit your needs. Additionally, you can edit the image and titles if desired.
RSVP
RSVP allows you to send invitations with the option for your attendees to respond. Attendees can choose to attend the event or decline the invitation by sending a personalized message to you. You will be able to see their responses and messages in the list.
Invite-only Events
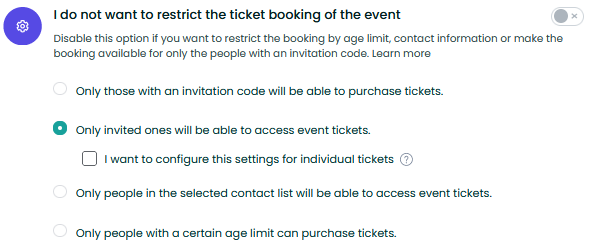
You can host private events using our event restrictions feature for Invite Only Events. Invite Only Events allows you to manage events visible only to those you have invited. To enable this, go to settings and select the “Only invited ones will be able to access event tickets” event restriction from event settings.

You can make the whole event invite-only or only specific dates or tickets. We offer you complete versatility in managing your events. If you wish to invite attendees only on a particular day or ticket, you can select the dates when sending the invitations. This also works for non-restricted invitations. You can also send invitations for the event by selecting “Skip” on the date and ticket selection page.
Seat Reservation
Invitations are used to reserve seats for your attendees when using Allocated Seating for your event. Once you invite someone, they appear in the reservation list, and you can select a seat for them to reserve. During purchase, only the person who was invited with the seat reserved will be able to book the seat, while others will see the seats as unavailable.