EventBookings Scan Station allows you to check in attendees, record attendance, and track attendee activities in real-time with the EventBookings Organiser App. The EventBookings Organiser App is free to download from the app store.
You can download the app from the Apple App Store or Google Play Store for free and start scanning for your events.
How to Utilise EventBookings Scan Station:
Log in to the app with your EventBookings credentials. After a successful login, all your organisations and events will be available on the homepage. If you use multiple organisations, navigate to the profile on top and switch from there.
If you have multiple volunteers or team members working on your event who need access to the app, you can use the My Team feature to create roles for them. Once they are added to your organisation with proper permissions, they can help you with check-in, check-out, and activity tracking.
Scanning: Scanning with the app is easy and fast. Tap on the scanning button and scan the QR code of a ticket. If the ticket is valid and belongs to one of your ongoing events, the scan will be successful, and you will see the details in the menu. The app will show an invalid scan message if the ticket is invalid.
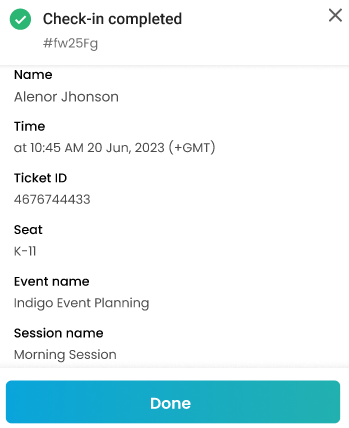
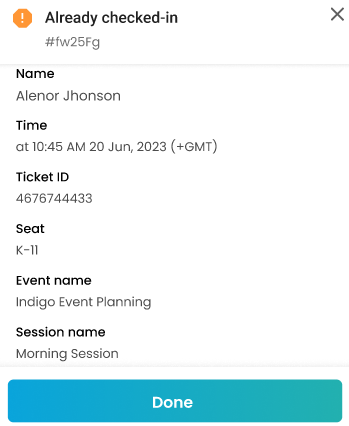
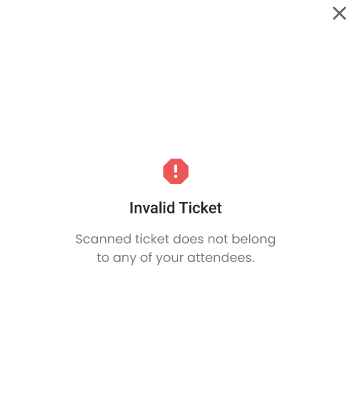
Scanning the same ticket multiple times will show the “Already Checked-in“status. You can scan the same ticket multiple times to check in and check out attendees from the sessions and track the activities.
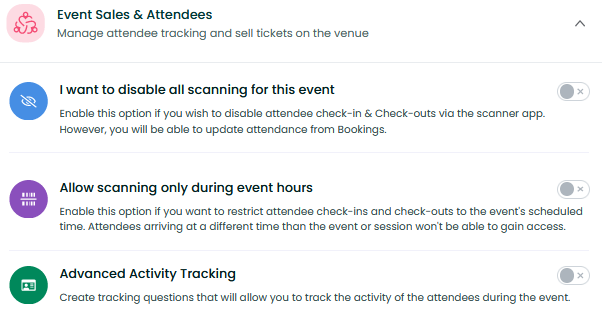
Advanced Activity Tracking: If your event includes multiple sessions, or you need to track specific activities like food or bag collection, or if it spans multiple days and you want to track attendance for each day, you can use the Advanced Activity Tracking feature. This feature lets you create custom questions and answers to track these activities. For example:
- Scenario: You’re hosting a three-day conference with various workshops and networking sessions. You want to track which attendees participated in each workshop and networking event to gather feedback and improve future events.
- Solution: Enable Advanced Activity Tracking in the event settings. Create questions like “Which workshops did you attend?” with multiple-choice answers listing the workshop names. For networking events, you could ask, “Did you participate in the networking session?” with a “Yes” or “No” option. This way, you can gather detailed insights into attendee participation.
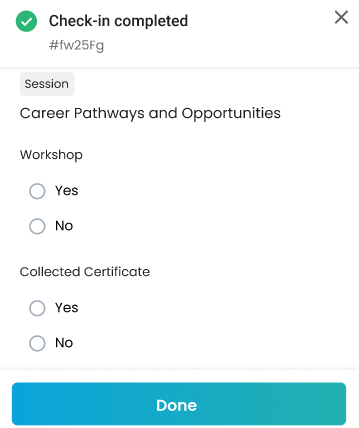
The attendee’s timeline includes all activities, check-in, and check-out records. Open the event and select “Update” from the attendee for whom you want to view the timeline.
If you want your attendees to check in and check out only during the event hours, you can configure this from the settings. You can also stop checking and check out immediately for the event from the settings.
Managing Attendance
You can easily track the total number of people who attended your event and those who are yet to attend. When you open the event, you’ll see a list of attendees divided into those who have attended and those who have not. This list updates in real time.

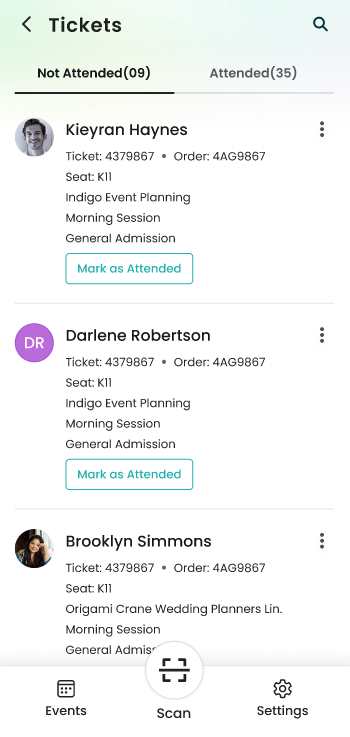
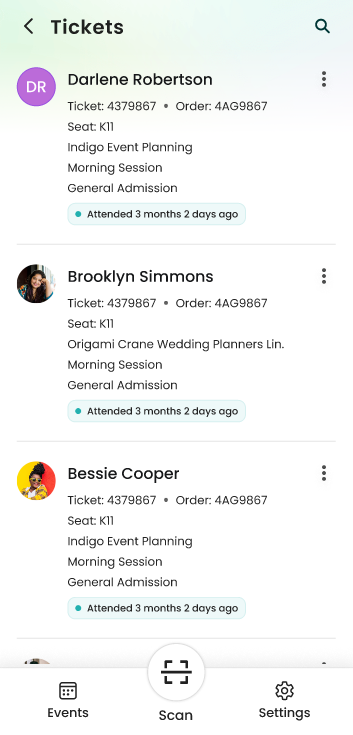
To manually update attendance, go to the update menu. From there, you can mark someone as attended or absent. Once marked as absent, their attendance and tracking data will be removed permanently.

