You can restrict your booking of events in multiple ways. Let’s have a look:
| Restriction Type | Description |
|---|---|
| Restrict by codes | Those without an invitation won’t be able to see the event details or access the limited tickets. |
| Invitation only | Make your event exclusive to invited guests only. Those without an invitation won’t be able to see the event details or access the limited tickets. |
| Restrict contact lists | Restrict bookings with your contact lists. Only attendees from the selected lists will be able to make the bookings. |
| Age limit | Limit the event entry by setting up an age limit. |
Event restriction: Restrict with an invitation code
Offer private access to your event’s ticket types to your event speaker, host, VIPs, staff or guests. Include regulations to restrict the booking of your event tickets and make them available to people with a particular invitation code.
Create an invitation code.
To create an invitation code:
- Select the ‘Only those with invitation code can make bookings for the event’ option.
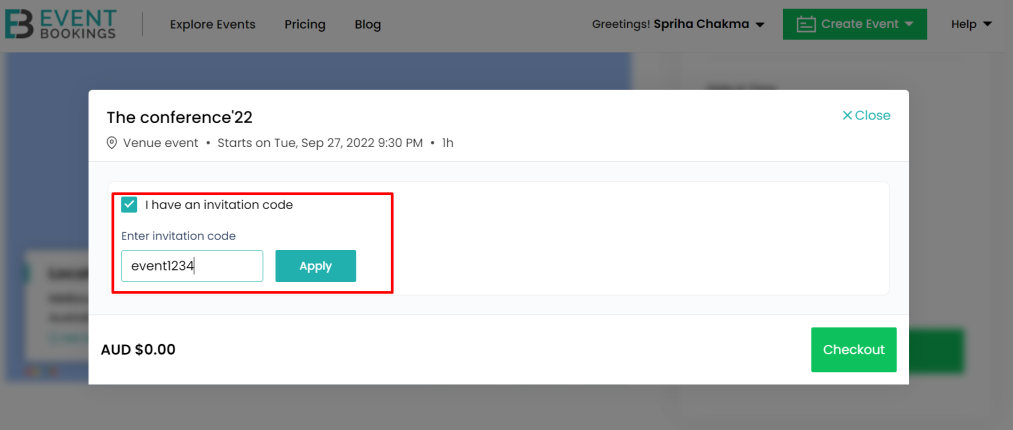
- Click Set an Invitation Code and create a code—for example, event1234.
- Or, to set code usage limits with quantity (per ticket), choose the option ‘I want to configure this setting for individual tickets.’
- Go to tickets and create or edit keys.
- Navigate to advanced settings and set the invitation code for the specific ticket type.


How does an attendee use this code?
Your attendees can apply the invitation code on the ticket selection page and purchase your event tickets by using the invitation code.
Event restriction: Restrict with an invitation link
Offer private access to your event’s speaker, host, VIPs, staff or guests. Only allow the attendees with the invitation link to make bookings for your event.
Once the restriction is selected, you can invite your guest from the “Invitations”. Learn how to send invitations from Invitation – EventBookings | Help Center
Once the restrictions are set, anyone without the invitation email cannot view the event or the restricted tickets.
Event restriction: Restrict with specific email addresses
Restrict bookings with your contact lists. You can bring your guest lists or select a contact list from your premium events. Only attendees from the set lists will be able to make the bookings. Learn more about contact lists from Contacts and Contact Lists – EventBookings | Help Center
Where to find the settings?
To find the settings for event restriction:
- Go to your event dashboard.
- Head to Settings under the event details category.
- Find the event settings section and set the settings based on your preferences.
- Select the ‘Only people invited with a specific email address will be able to make bookings for the event’ option.
- Select a contact list from the drop-down (created and system-generated contact list). Or, click +New Contact List to add a new list and import contacts.
- Click save to update all changes.

Add contact list
To add contact list:
- You can search contacts from your default contact list or the ones you have created.
- Select one or more lists from the drop-down.
- Or, click +New Contact List to add a new list and import contacts.
- Or, to enable the restriction for a specific type, choose the option ‘I want to configure this setting for individual tickets.’ and go to tickets to configure for a specific ticket type.
- Click save to update all the changes.

Event restriction: Restrict booking by age limit
Restrict your event booking by age limit so those under the age limit cannot register for your event. Customise your event by setting a specific age limit to apply age restrictions to your event.